

Key Takeaways
- Investigate the home’s condition before selecting finishes or changing the layout.
- Fix water, structural, safety, and code issues before investing in cosmetic upgrades.
- Preserve original details when repair or sensitive adaptation is practical.
- Plan energy efficiency, ventilation, accessibility, and future household needs together.
- Confirm local approvals early and keep a contingency fund for concealed conditions.
Renovating an older home is an opportunity to improve daily life without erasing the details that made the property appealing in the first place. Whether the goal is a more functional kitchen, a better insulated envelope, or room for a growing household, success starts with understanding what is already there. Homeowners who work with experienced Architects in Ardmore, PA can create a plan that respects the building’s character while addressing modern needs. Older properties often have uneven floors, layered additions, aging systems, unusual room arrangements, and repairs completed across several decades. That does not make them poor candidates for renovation. It means the project needs a deliberate order: learn the home’s story, identify its risks, set priorities, then design improvements that fit the house rather than fight it.
Why Older Homes Need A Different Renovation Plan
Newer homes are generally built around predictable materials and current building practices. Older homes may include original plaster, knob-and-tube wiring, undersized electrical panels, masonry that needs specialized care, or framing that differs from modern standards. Previous owners may also have enclosed porches, moved walls, covered leaks, or altered mechanical systems without leaving reliable records. A thoughtful renovation treats these unknowns as items to investigate rather than inconveniences to ignore.
Step 1: Learn The Home’s Story
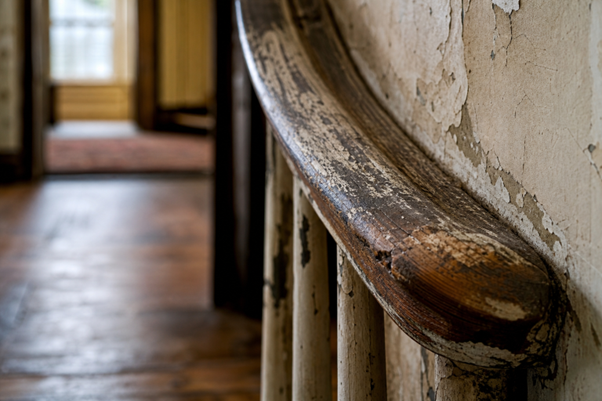
Before finalizing a wish list, gather information about the property. Check the approximate construction date, past owners, old listing photographs, local archives, permit records, and any available original plans. Look closely at changes to the roof, windows, siding, additions, and interior layout. This research can reveal which doors, trim profiles, built-ins, flooring, and exterior features are original, and which elements were later alterations. That context helps homeowners make better choices. A worn original stair rail may deserve restoration, while a poorly designed rear addition may be the right place for a major reconfiguration. The aim is not to freeze the house in time. It is to distinguish meaningful character from changes that no longer serve the home.
Step 2: Inspect Before Designing
Arrange a detailed existing-condition review before committing to layouts, cabinetry, or finishes. The review should consider the foundation, roof, drainage, framing, moisture conditions, electrical service, plumbing, heating and cooling, insulation, windows, and indoor air quality. If the project is substantial, bring in specialists such as a structural engineer, an electrician, a plumber, or an environmental professional when needed. Hidden issues are common. Water damage can sit behind finished walls, old drawings may not match what was built, and ventilation can be inadequate after earlier updates. During renovation planning, moisture control and fresh-air strategies matter as much as insulation. The EPA’s remodeling guidance is a useful resource for coordinating air sealing, ventilation, and indoor environmental concerns.
Step 3: Set Priorities Before Setting The Budget
Divide the scope into clear categories so unexpected discoveries do not immediately derail the project:
- Must Fix: Structural movement, water intrusion, unsafe wiring, failing plumbing, fire safety concerns, and code-related work.
- Should Improve: Storage, energy performance, accessibility, lighting, ventilation, and everyday circulation.
- Would Like: Specialty finishes, decorative extras, luxury features, and lower-priority rooms.
This order protects the essentials. If the wall opened during construction reveals damaged framing or obsolete piping, the budget is not dependent on sacrificing a necessary repair to preserve a decorative choice.
Step 4: Protect Character-Defining Features
Original doors, plaster, staircases, flooring, masonry, hardware, windows, roof lines, and built-ins often give an older home its scale and identity. Before replacing one, ask whether it can be repaired, adapted, or replicated while preserving its proportions. A replacement may be appropriate when a feature is beyond repair, but it should not be the automatic first choice. The National Park Service’s historic preservation standards and guidelines offer a practical framework for retaining important materials and features while allowing a building to support current use. Even homes without formal historic designation can benefit from this approach.
Step 5: Improve Comfort And Energy Performance Together
Energy upgrades work best as a connected system. Start with an energy and moisture review, identify major air leaks, address insulation gaps, evaluate windows and doors, and then size mechanical upgrades around the improved envelope. Avoid adding insulation or tightening a building without considering drainage, vapor movement, and ventilation. Prioritize durable improvements that make the house more comfortable in every season: controlled air leakage, appropriate insulation, effective shading, well-designed heating and cooling, and moisture management. After work is complete, confirm that bathrooms, kitchens, laundry areas, and other moisture-producing spaces are ventilated effectively.
Step 6: Plan New Space With Care
Additions and major layout changes should respond to the original home’s scale, circulation, roof form, window rhythm, and materials. A new kitchen, office, guest suite, or family room does not need to imitate every historic detail. It should feel compatible without creating a false version of the past. For example, a modest addition may look more natural when it follows the existing roof pitch and window spacing than when it copies ornamental features out of proportion.
Step 7: Build In Accessibility And Flexibility
Plan for changing needs early. Better stair lighting, lever-style handles, wider clear paths, easy-to-reach storage, reinforced bathroom walls for future grab bars, a zero-threshold shower, or a first-floor sleeping option can improve usability without making the home feel institutional. Flexible rooms also make the property more useful if household routines change over the next five to ten years.
Step 8: Confirm Permits, Zoning, And Historic Review
Requirements differ by municipality and neighborhood. Check rules for additions, exterior changes, demolition, grading, trees, accessory structures, septic systems, and setbacks before finalizing the design. A property can be subject to local historic review even if it is not listed on a national register. Contact the local building department and preservation office early, since approval timelines can affect the construction schedule.
Step 9: Create A Realistic Budget And Team
Include investigation, surveys, design, engineering, permits, repairs, mechanical work, finishes, temporary housing, storage, and contingency funds in the budget. Older homes need flexibility because concealed framing damage, outdated systems, and past alterations may only become visible after demolition begins. Choose a team with experience in older buildings. Ask contractors and designers about comparable projects, local approvals, documentation methods, treatment of original materials, communication practices, and pricing for changes. A strong team will help sequence the work from research and condition assessment through feasibility, concept design, budget testing, detailed drawings, permits, construction, and final inspections.
Common Mistakes To Avoid
- Starting demolition before documenting existing conditions.
- Choosing finishes before resolving water, structural, or safety problems.
- Assuming old plans are accurate.
- Replacing original features without exploring repair options.
- Air sealing without planning for ventilation.
- Underestimating permit timelines or skipping a contingency fund.
- Making room-by-room decisions without a whole-home strategy.
Conclusion
The best older-home renovations begin with careful observation rather than quick demolition. Study the house, protect what gives it value and character, solve urgent problems first, and plan future needs alongside present comfort. Understanding the original design, materials, and structural conditions helps homeowners make smarter renovation decisions while avoiding unnecessary changes. With clear priorities and a well-coordinated team, an older home can remain authentic while becoming safer, healthier, more efficient, and better suited to its next chapter. Thoughtful improvements can preserve the home’s history while adding modern conveniences, improved functionality, and lasting value for future generations.
